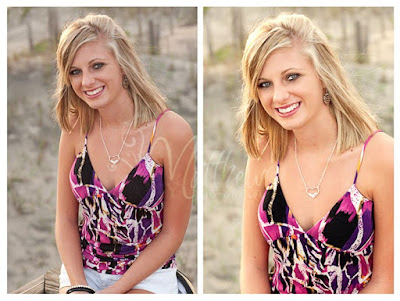
She's a little underexposed and pink so here's what I did:
lightroom 3-
upped the exposure slider a little, removed all sharpening (I'd rather do it in photoshop), clicked on calibration profile for this particular lens and exported, open in CS4
photoshop-
use levels dropper and picked the brightest spot on her shorts to set the white point.
new layer- levels again, this time the black dropper on her shirt to set the black point - masked that off the face and skin a little so it wouldn't be too contrasty.
Flattened layers.
Levels helps a HUGE amount. If you get your whites white and blacks black then color casts and other color issues are much easier to deal with IMO. I can't live without my levels adjustment....
Ran TRA pro retouch at 13% on skin
Flatten layers.
Ran Florabella milk and honey action 14%. The gold reflector already gave her a little golden glow, but the yellow tint in that particular action (along with levels adjustment) helped tone down all the pink.
Crop
Sharpen
Took less than 4 mins.
Very basic editing. A little goes a long way!
About that 4 minutes......calculate that times about 800 and then we see why wedding pictures take so long to finish! And there's a lot more to it than that. Renaming files, loading to galleries, culling images, etc.....

No comments:
Post a Comment